Happy Sunday!
I finally got some crafting time and made a card using the Operation Write Home Sketch 80. They post a weekly challenge with a sketch to get you started, see here to get you started.
Here's my flavor of the sketch:
The finished size of the card is A2 (5 1/2 x 4 1/4). The background paper and two solid pieces are from a coordinating set of 8 1/2 x 11 paper that I got for Christmas in an exchange and I can't remember who it's by.
The sentiment comes from the Discover Palette title stickers and the flower is from Reminisce paper flowers and both are from Creative Memories.
I gave the flower some dimension by using a pop-up dot.
Hope you all enjoy your upcoming week! Be safe!
Showing posts with label Creative Memories. Show all posts
Sunday, July 31, 2011
Tuesday, July 12, 2011
OWH - Sketch Challenge # 77
Good evening,
Operation Write Home Stars and Stripes blog posted a new sketch challenge. Sketches are layouts with dimensions that can be used in card making. This challenge is for new sketch # 77.
The circles are cut using the circle cutting system patterns from Creative Memories. The inside track was used on all three patterns and cut using the red blade. The dimensions are 1.5, 2.5, and 3.5 inches.
Background paper is from the Recollections All Seasons pad. The card stock is generic card stock and the brads are from Michael's. The finished size of the card is A2 (4 1/4 x 5 1/2).
Have a great evening!
Robin
Sunday, July 3, 2011
OWH - Challenge # 16 All About Animals!
Okay, this is the last card of the night. I'll catch up on the remaining 11 cards tomorrow. But I'm very excited because this will be my first batch of cards that I will send in to OWH.
The instructions for this challenge are on MousePrint Creations.
The puppy is from Create a Critter and is cut at 2.5 inches. The background paper is from Creative Memories the Discover palette. Yes - all the mentions of the Discover paper has all been from the same 12x12 sheet. Finished size is A2 (5 1/2 x 4 1/4).
More cards tomorrow - have a good evening and a safe Fourth of July!
OWH Challenge #14 - Color Me Crazy
Here's my catch up card for challenge #14 - Color Me Crazy. The instructions are on My Craft Central.
All cuts are from Create A Critter and are cut at 2 inches. The background paper is from Creative Memories - Discover palette. Finished size is A2 (5 1/2 x 4 1/4).
More to come, still catching up.
All cuts are from Create A Critter and are cut at 2 inches. The background paper is from Creative Memories - Discover palette. Finished size is A2 (5 1/2 x 4 1/4).
More to come, still catching up.
Operation Write Home - Weekend Challange
Hello all,
It's been a while since I posted. Live got a little crazy. But this weekend I'm participating in a challenge put on by Operation Write Home for their Virtual Card making Party.
Operation Write Home is a not-for-profit group who collects handmade cards from all over the US and sends them to deployed troops. The soldiers use them to write home to their families. This is a wonderful opportunity to give back to our troops overseas.
I wasn't able to participate yesterday, so hopefully I can catch up. But here's the card from the 9 am challenge - Pinwheels.
The instructions for the challenge are on Hello From Kate.
My Pinwheel is cut from a 3x3 piece of Creative Memories paper - the Discover palette. The background is also from Creative Memories - Discover. Finished size is A2 (5 1/2 x 4 1/4).
More cards to come.......
Monday, February 14, 2011
Happy Valentines Day!
Good evening all,
I hope your day was wonderful and filled with family and friends. I just wanted to share the card I made for my wonderful hubby, who just happened to get me paper for v-day (isn't he awesome!).
I didn't share this earlier because I didn't want to spill the beans about his card.
I decided that I enjoyed the Shutter card so much, that I wanted to make his card a Shutter card.
The Shutter card folds up to A2 size envelope (5 1/2 x 4 1/4).
Recipe:
Base is black generic card stock
All the colored paper is from Recollections All Seasons slab - in fact the red paper is all from the same piece of paper the black flower things were the corners of the paper and then the red paper with the strips is from the sides.
The center piece of red card stock was a scrap I had.
The heart was cut from Gypsy Wanderings at 2 - 3 inches (can't remember). I cut it from white card stock and then colored it gold with my Creative Memories gold wide tip pen.
The stitiching around the different panels is the Creative Memories gold fine tip pen.
I enjoyed making the card and he even got some compliements at work because I asked him to put it on his desk.
Have a great evening!
Robin
Sunday, February 6, 2011
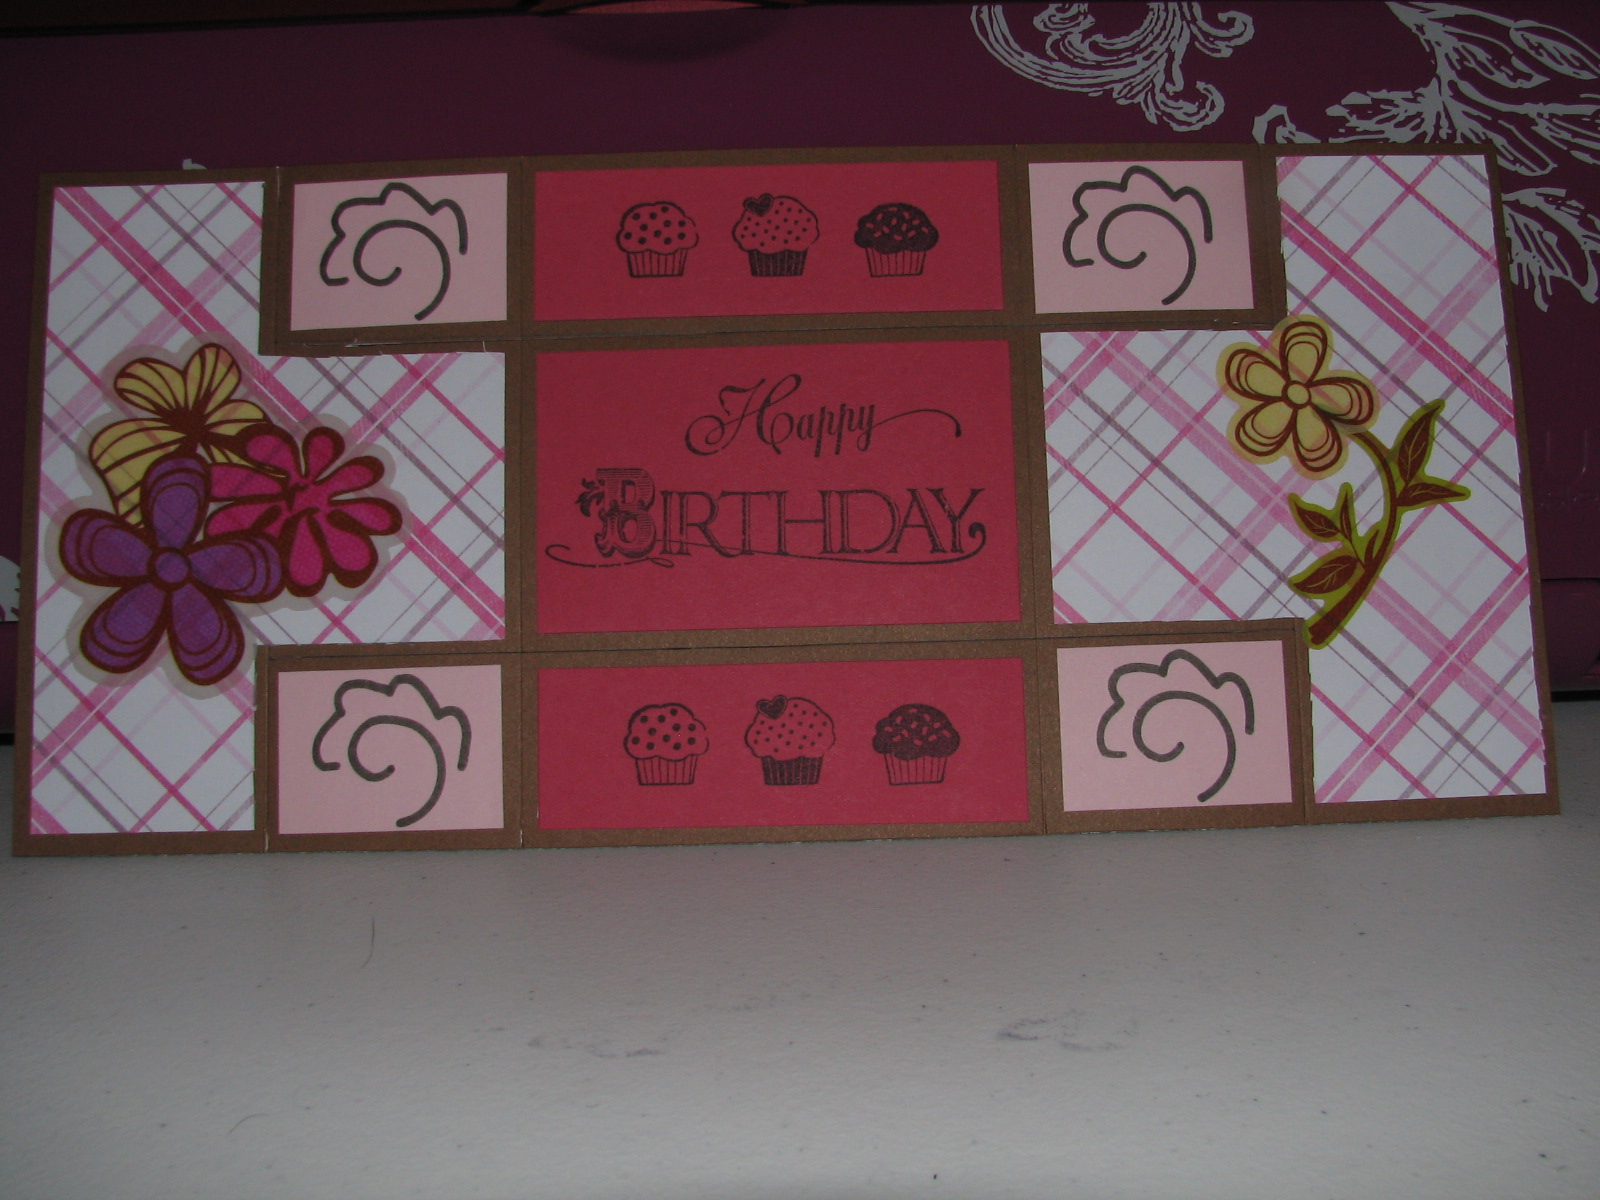
Shutter card - birthday card
Good Superbowl Day all,
Hope you are all having a wonderful day.
Last night I was cruising around the various blogs that I follow and the Christy Blade Handmade blog had a Valentine's Day card called a 'shutter card.' I had never seen this design before, so of course, I Googled it.
One tutorial and one trial run later, I decided I had to try it out for real. As luck would have it I need another birthday card this month, so I used the Shutter card technique.
Here's the finished product and below I'll have the basics of making the card and my recipe.
The card itself is 5 1/2 x 12 inches and folds up to an A2 size card.
Cut the base and the score the card at 2, 4, 8, and 10 inches. Then measure 1 1/2 inches from the top and the bottom and make a cut along the length of the card from the 2 inch score to the 10 inch score.
I decided that my life would be decidedly easier if I put all the decorations on the card BEFORE I did the folding. It turns out I was right. :-)
I can't give you the exact measurements for the paper on top of my base, except for that I took 1/4 inch off the original measurement so that I would see some of the base around my paper.
Now here's my recipe:
Plaid type paper is from Recollections ALL GIRL stack
The solid card stock is all generic card stock
The Happy Birthday is from Inkadinkado
The cupcakes are fromTPC Studio 'Hugs and Kisses'
Stickers from Creative Memories Simply Beautiful color pallate
The doodles were made using the Doodles template from Creative Memories
Hope you enjoy your day and good luck to whomever your favorite team is!
Robin
Tuesday, February 1, 2011
Birthday card for my pop
Hi all,
My Dad's 63rd birthday is this week so I wanted to make him a birthday card. I have been wracking my brain about what to put on the card.
Finally, I looked at my CM Reminisce Accents cartridge and decided that I wanted to use the scrolls from the cart.
Recipe:
Orange card stock is from a stack from Wal-mart (can't remember it's name)
Brown is from a card stock pack from Michaels
Red (scrolls) is generic
The scrolls are cut at 1 1/2 inches from CM Reminisce Accents cart
Used CM chalking brown ink to ink the paper tear
Happy Birthday stamp from Inkadinkado
Generic black ink
I hope he likes it.
If you are somewhere with the horrible snow, keep safe and warm.
Until later,
Robin
Wednesday, January 26, 2011
My Pink Stamper Super Yummy Challange
Evening all,
Over on My Pink Stamper it is Imagine Pink Wedensday. Her challange was to make something super yummy. I don't have a Imagine, but she said the Cricut users can play along too. So here is my creation:
Receipe:
- all cuts came from Creative Memories Cricut Cartirdge Cheerful Seasons
- saying is 1 1/2 inches
- watermelon is 2 inches
- all cardstock is from scraps
- I used the Creative Memories white chalking ink on the watermelon and on the title
- card base is 4 1/2 by 7
When I cut the watermelon, I went to brown for the title because I thought of the dirt here in AZ. Then I figured it should be on yellow card stock for the sun. I used the chalking ink on the watermelon because you can always see some white on them. Then, he he, I figured if I was going to make the card yellow for the sun, I should put the chalking innk on the title too for the gallons of sun block I use in the summer.
Enjoy your evening!
Robin
Sunday, January 16, 2011
Pay it Forward 2011 - Part I
Hi all,
This is part of my contribution for the Pay it Forward 2011 project. At the begining of the year a few people were posting on Facebook about hand making something and sending it to the first five people who commented on their post. Then that person in turn put the same thing on their status in Facebook.
So for my people, I am making a four card set (with envelopes of course) and a box for it to go in. This post is the first card.
Reciepe:
Brown cardstock 5 1/2 x 8 1/2
Taupe or light brown (2nd layer 4 x 5
Frog (Cricut Lite Playtime) cut at 2 inches (paper from a cardstock paper kit)
Get Well (Classic Cricut Font) cut at 1 1/12 inches
Base - beige (cardstock)
Top Layer - All Seasons (slab) from Michaels
Handwritten message - brown fine tip Creative Memories pen
Adhesive - Creative Memories Tape Runner and Precison Point Adhesive Pen
Hope you enjoy!
Robin
This is part of my contribution for the Pay it Forward 2011 project. At the begining of the year a few people were posting on Facebook about hand making something and sending it to the first five people who commented on their post. Then that person in turn put the same thing on their status in Facebook.
So for my people, I am making a four card set (with envelopes of course) and a box for it to go in. This post is the first card.
Brown cardstock 5 1/2 x 8 1/2
Taupe or light brown (2nd layer 4 x 5
Frog (Cricut Lite Playtime) cut at 2 inches (paper from a cardstock paper kit)
Get Well (Classic Cricut Font) cut at 1 1/12 inches
Base - beige (cardstock)
Top Layer - All Seasons (slab) from Michaels
Handwritten message - brown fine tip Creative Memories pen
Adhesive - Creative Memories Tape Runner and Precison Point Adhesive Pen
Hope you enjoy!
Robin
Subscribe to:
Posts (Atom)